Notes: MFA Authentication requires a third-party application, such as Microsoft Authenticator. The following instructions may change slightly, so please ensure you read through the instructions provided on your screen when setting up MFA.
If a Persimmony user has the following checked in their security settings, their organization requires MFA verification upon login.

To set up MFA verification, ensure you have an authenticator app downloaded on your phone. We recommend using Microsoft Authenticator.
Login link for Persimmony Suite: https://web.persimmony.com/
1. Upon login to Persimmony, you should see this notification.
2. Select Setup MFA.

Note: If you DID NOT see the above notification upon login, please follow these instructions. If you did see the above notification, proceed to step 3.
1. Select My Profile in the bottom left corner of your screen.
2. Select MFA.

3. You will be directed to login to Persimmony once again.
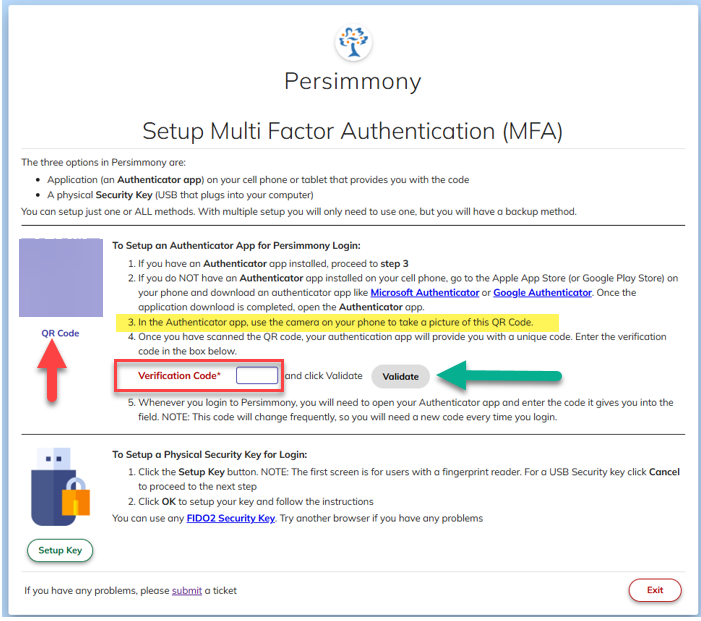
4. Enter your login credentials and you should see the following instructions (figure A below) pop-up on your screen.
5. Open your Authenticator App on your phone or tablet and select Verified ID's (Screenshot below from Microsoft Authenticator) use the camera to take a picture of the QR Code provided on your screen.
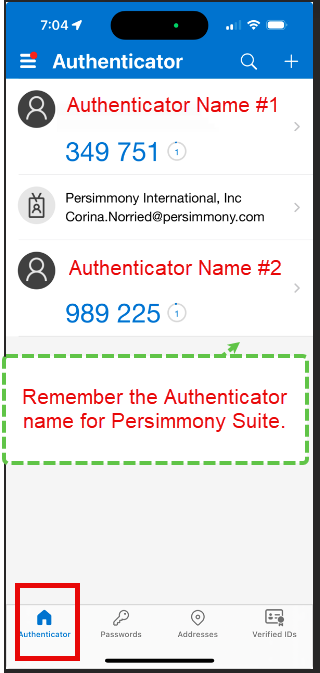
NOTE: You may be prompted to rename the authenticator. Please choose a NEW name and remember it. This is the one you will use each time you login to Suite.

6. After scanning the QR code, your authentication app will provide you with a numerical code. Enter that code into the Verification Code field on your screen.
NOTE: If you scanned the QR code and your app doesn't provide you with the code after re-naming it, click "Authenticator" at the bottom of your device. The numerical code you see next to the new name is the code you will enter.
7. Select Validate.
(Figure A:)

Should you need to disable MFA at any time, you will need to set it up again by following these instructions.
